Description
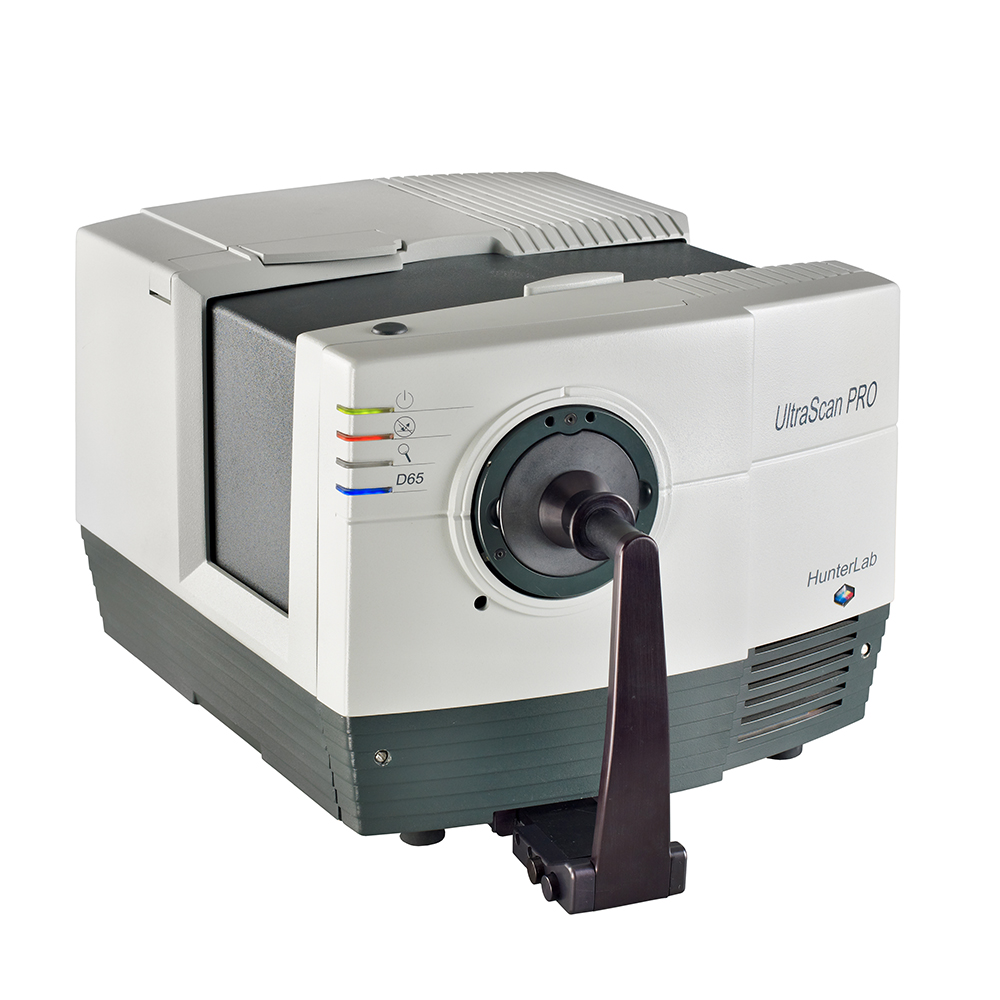
Ideal for demanding research and quality control applications.
The D65 illumination source is calibrated in the ultraviolet region for the accurate measurement of whitening agents. UltraScan PRO has an extended wavelength range into the near infrared and near ultraviolet that permits the measurement of camouflage materials and UV blockers. The system uses diffuse/8° geometry with automated specular component inclusion/exclusion. It also features three sizes of sample measurement areas with automated lens change. The UltraScan PRO includes EasyMatch QC software and an electronic record keeping version that is 21 CFR 11 compliant is available.
Use UltraScan PRO for both research and quality control. From opaque solids to clear liquids to transparent films, UltraScan PRO precisely measures both reflected and transmitted color, spectral reflectance, spectral transmittance and transmission haze. A host of measurement features and specialized sample-handling devices make UltraScan PRO the most versatile high-performance color measurement benchtop spectrophotometer available.
Explore all the additional features and benefits below.
Product Specifications
Measurement Principle: Dual-beam spectrophotometer
Geometry: Diffuse d/8° reflectance, d/8° total transmission, d/0° regular transmission
Spectrophotometer: Two polychromators, each with a 512 element diode array and a high resolution, concave holographic grating
Sphere Diameter: 152 mm (6 in.)
Sphere Coating: Spectraflect™ for sphere, Duraflect™ for port plate and specular exclusion door
Port Size/Measured Area:
- Port Diameter/View Diameter in RSIN/RSEX reflectance modes
- Large Area View (LAV): 25 mm (1 in) illuminated/19 mm (0.75 in) measured
- Medium Area View (MAV): 13 mm (0.5 in) illuminated/9 mm (0.35 in) measured
- Small Area View (SAV): 7 mm (0.25 in) illuminated/4 mm (0.16 in) measured
- Port Diameter/View Diameter in TTRAN transmittance modes
- Large Area View (LAV): 25 mm (1 in) illuminated/17.4 mm (0.69 in) measured
- Medium Area View (MAV): 25 mm (1 in) illuminated/13.2 mm (0.52 in) measured
- Small Area View (SAV): 25 mm (1 in) illuminated/11.6 mm (0.46 in) measured
- Port Diameter/View Diameter in RTRAN transmittance mode where lens is field stop for all areas of view
- Large Area View (LAV): 17 mm (0.67 in) illuminated/17 mm (0.67 in) measured
- Medium Area View (MAV): 17 mm (0.67 in) illuminated/17 mm (0.67 in) measured
- Small Area View (SAV): 17 mm (0.67 in) illuminated/17 mm (0.67 in) measured
Lens Switching for LAV/MAV/SAV: Automatic
Specular Component: Automated Included (RSIN) or Excluded (RSEX) in reflectance
Spectral Range: 350 nm – 1050 nm full CIE visible range plus NIR
Wavelength Resolution: < 2 nm
Effective Bandwidth: 5 nm equivalent triangular
Reporting Interval: 5 nm
Photometric Range: 0-150 %
Light Source: Pulsed Xenon lamps (3), calibrated and controlled in the UV range
Automatic UV Control:
- 400 nm cutoff filter for UV control and UV exclusion
- Optional 420 nm cutoff filter for UV exclusion
Transmission Modes: Total (TTRAN) and Regular (RTRAN)
Transmission Compartment:
- Large and open on 3 sides
- 10.2 cm D X 35.6 cm W x 16.5 cm H (4 in. D x 14 in. W x 6.5 in. H)
Standards Conformance
- Reflectance: CIE 15:2004, ISO 7724/1, ASTM E1164, DIN 5033, Teil 7 and JIS Z 8722 Condition C
- Transmittance: CIE 15:2004, ASTM E1164, DIN 5033 Teil 7 and JIS Z 8722 Condition E, G Haze conformance per ASTM D1003 Section 8. Procedure B Spectrophotometer
Standards Traceability: Instrument standard assignment in accordance with National Institute of Standards and Technology (NIST) following practices described in CIE Publication 44 and ASTM E259
Colorimetric Repeatability (20 readings):
- < 0.03 ∆E* CIE L*a*b * on white tile in LAV mode
- < 0.07 ∆E* CIE L*a*b* on blue denim tile in LAV mode
Spectral Repeatability: Max 0.20 range between 435 nm and 695 nm
Inter-instrument Agreement:
- ∆E*< 0.09 CIE L*a*b* (Avg) on BCRA II Tile Set
- ∆E*< 0.20 CIE L*a*b* (Max) on BCRA II Tile Set
Dimensions:
- Height: 32.3 cm (12.7 in.)
- Width: 42.0 cm (16.5 in.)
- Depth: 49.8 cm (19.6 in.)
- Weight: 25.9 kg (57 lbs)
Power:
- 90 to 250 VAC, 50 to 60 Hz
- 60 watts passive, 120 watts maximum
Interface: RS-232C serial, 19,200 baud, DB9 (female) terminal
Operating Environment: 4° to 38°C (40° to 100° F), 10 % to 85 % RH, noncondensing
Storage Environment: -21° to 66°C (-5° to 150° F), 10 % to 90 % RH, noncondensing (-5° to 150° F)
Standard Accessories:
- Calibrated instrument white tile
- Certificate of traceability
- Black calibration light trap
- Transmittance zero calibration plate
- Green diagnostic tile
- Wavelength diagnostic filter
- Fluorescent standard
- Reflectance sample clamp
- LAV aperture
- MAV aperture
- SAV aperture
- RS-232C cable
- USB-to-Serial adapter
- Power cord
- EasyMatch QC Software
- EasyMatch QC Basic manual
